Faking the 3D look using corelDRAW (Part 2) - by 3dcoreldraw Team
We now have your shadow behind the 3d ball in our part 1. Roll up your sleeves and do some more work in this part 2 , where we will explain the process in text and show the result in the screenshots.
Creating the reflection: -----------------------------------------------------------------------------------------------
Imagine that this 3d ball is on a table, the opposite edge of the table will show in its reflection. Also if we had a white board (reflector) nearby, its reflection will be seen on the 3d ball. If the table was also reflective, then white board's reflection will be seen on it. And this, in turn will be visible on the 3d ball.
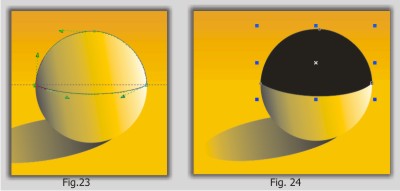
Use the "Freehand Tool" and the "Shape tool" to draw the shape in (Fig. 23) and paint it "Black" from the Color Palette (Fig. 24). Remember to remove the outline of every shape that you draw.
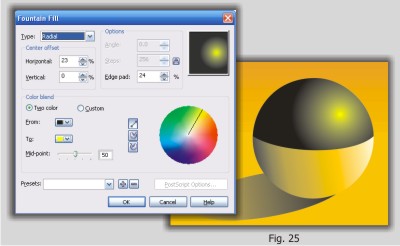
Now, apply the "Fountain Fill" to the black shape and input the following settings:
Type: Radial Edge Pad: 24 Horizontal: 23% Vertical: 0% Color blend: Two Color From: Black To: Deep Yellow Midpoint: 50
Click "OK" to apply the fill as in (Fig. 25).
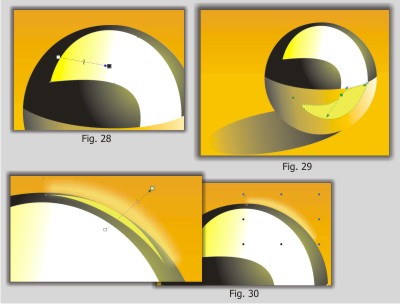
Use the "Freehand Tool" and the "Shape tool" to draw the shape and color it "White" as in (Fig. 26). Draw another smaller shape on the previous "White" shape and color it "Yellow". Remove the outline of both shapes.
Apply the "Interactive Transparency Tool" on the "Yellow" shape, so that the below "White" shape shows through (Fig. 28). Draw another shape below the "Black" shape and color it a little dark yellow as in (Fig. 29). Draw the Yellow shape as in (Fig. 30) above the 3d ball and apply the "Interactive Drop Shadow Tool". Order and place it behind the circle, so that only the drop shadow is showing (Fig. 30).
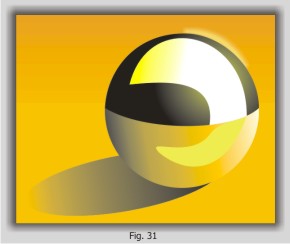
Your final image should look like (Fig. 31), before we continue to work on the Vase. Yes! we are going to draw and good looking 3d vase too.*smile* and remember to remove outlines where necessary.
Creating the Vase: ---------------------------------------------------------------------------------------------------
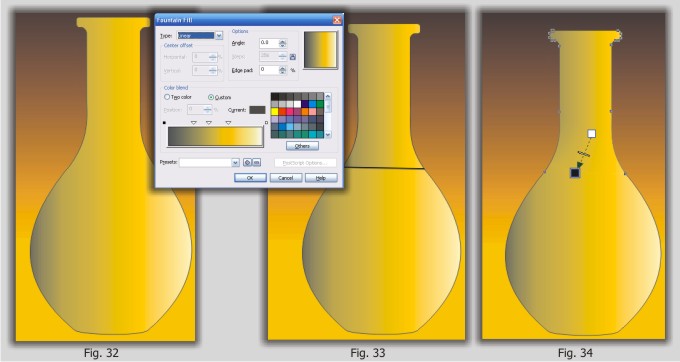
Use the "Freehand Tool" and the "Shape tool" to draw the vase in (Fig. 32) and apply a similar "Fountain Fill" that transformed the flat round ball into a 3d ball in Part 1 of this tutorial. Draw again the top half of the vase and apply similar "Fountain Fill" (Fig. 33). Now use the "Interactive Transparency Tool" and blend (Fig. 34). Remove any outlines.
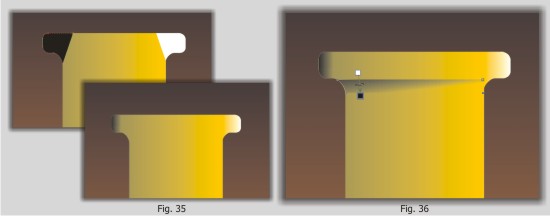
Shadows next. Carefully draw on the neck of the vase and apply transparency (Fig. 35) and (Fig. 36).
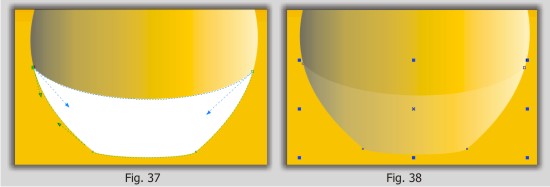
We need to create the glossiness and reflective effect. At the bottom of the vase, draw the shape in (Fig. 37) and apply a uniform transparency effect (Fig. 38).
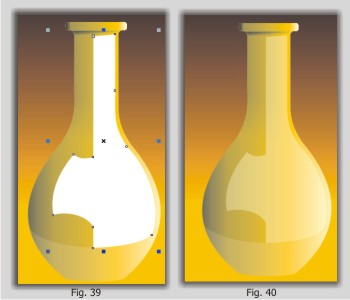
In the right half of the vase draw the shape in (Fig. 39) and apply uniform transparency (Fig. 40).
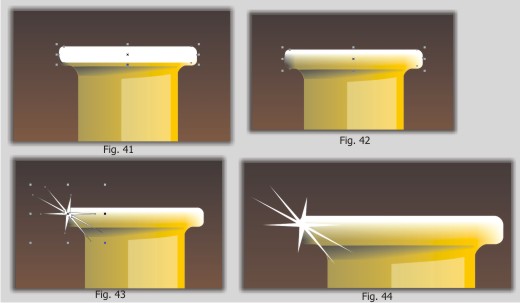
At the mouth of the vase draw a rectangular shape with rounded corners (Fig. 41) and top-bottom linear transparency to it (Fig. 42). To add some gloss, draw a White 8-sided star, skew and rotate, and place at the top left mouth of the vase (Fig. 43) and remember to remove outlines (Fig. 44).